11/22/2021
Here is the original map that was taken from Bexim’s Bazaar # 3 from March 2019. It was a magazine that The Tabletop Engineer used to make monthly, but it ended this year. The map looked interesting, but I needed to modify it slightly to go along with Wyloch’s True Tiles and the 1-1/4″ squares.

Using Dungeon Scrawl, I made this map of the dungeon that fits my needs. From this, I started to formulate my take on the dungeon. I wanted to incorporate my wife’s old warlock of Guanadaur named Sisava (a Yuan-Ti outcast) that she played during our Out of the Abyss campaign years ago. So I would need to change the statues in area 1 to look more like slimes. I also wanted to replace the pit trap with something more subtle.
I have thought of running this adventure as a 3rd level one-shot with 3rd level pre-generated characters. I will print out the same characters sheets as the Dalian Tomb, just at the 3rd Level. I will also include in each character package for the players a sheet with some suggested names, especially if players aren’t good or comfortable with names for races like Dragonborn, Dwarf, or Tiefling. (Trying to avoid player names like Bob the Dwarf and Doug the Tiefling.)
The idea of the adventure is the players have to save five brothers that went into the dungeon to look for treasure and haven’t returned.
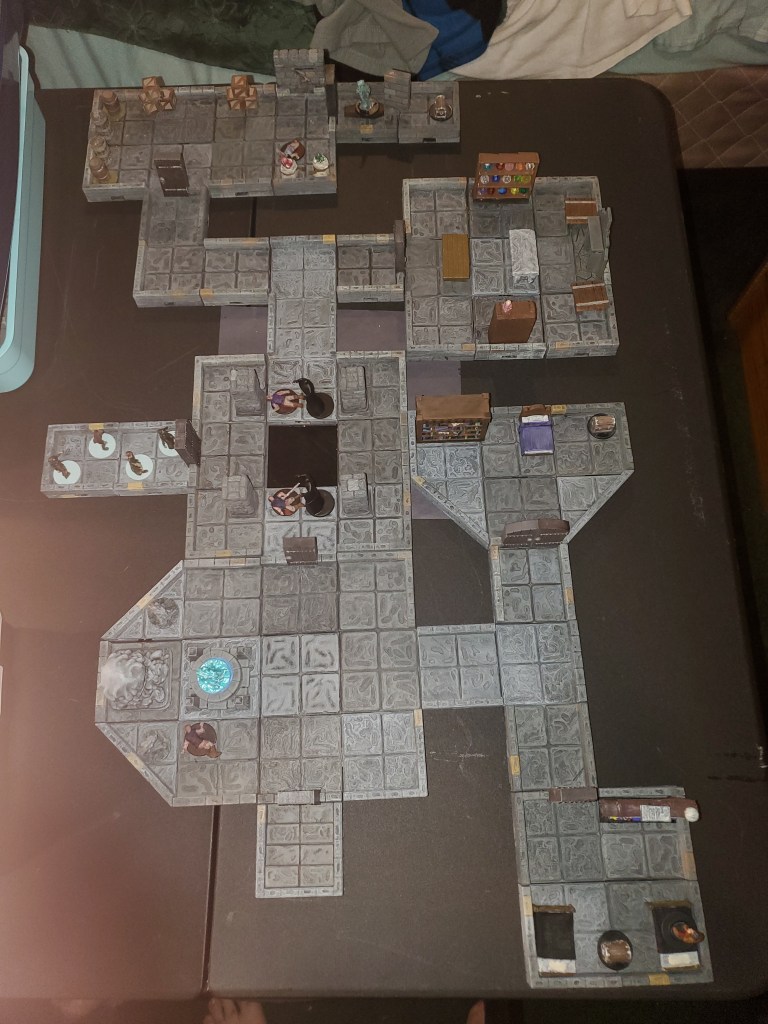
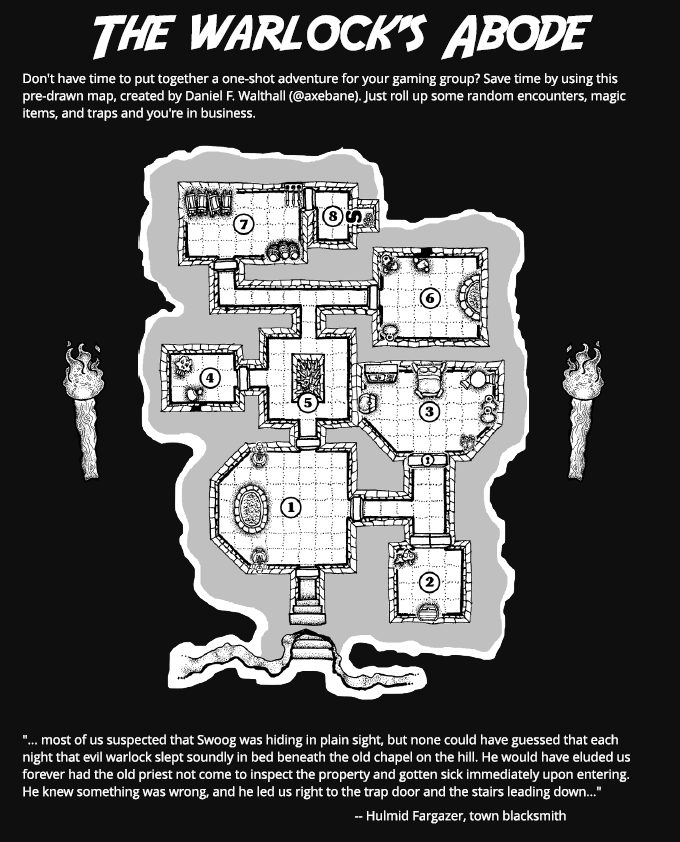
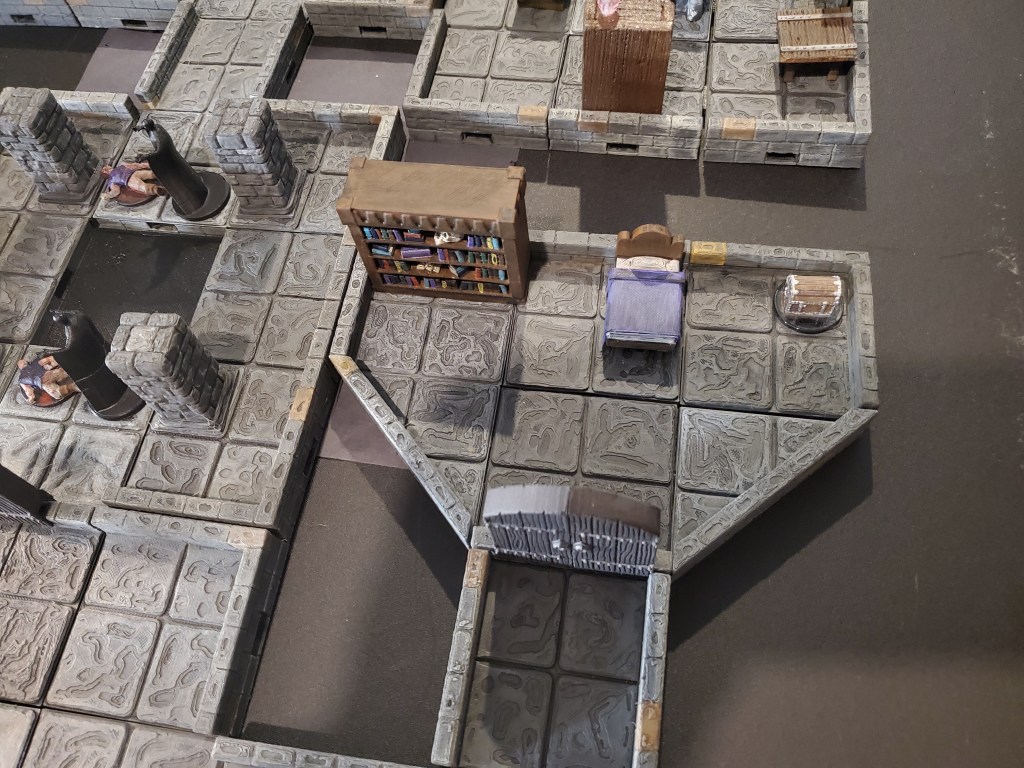
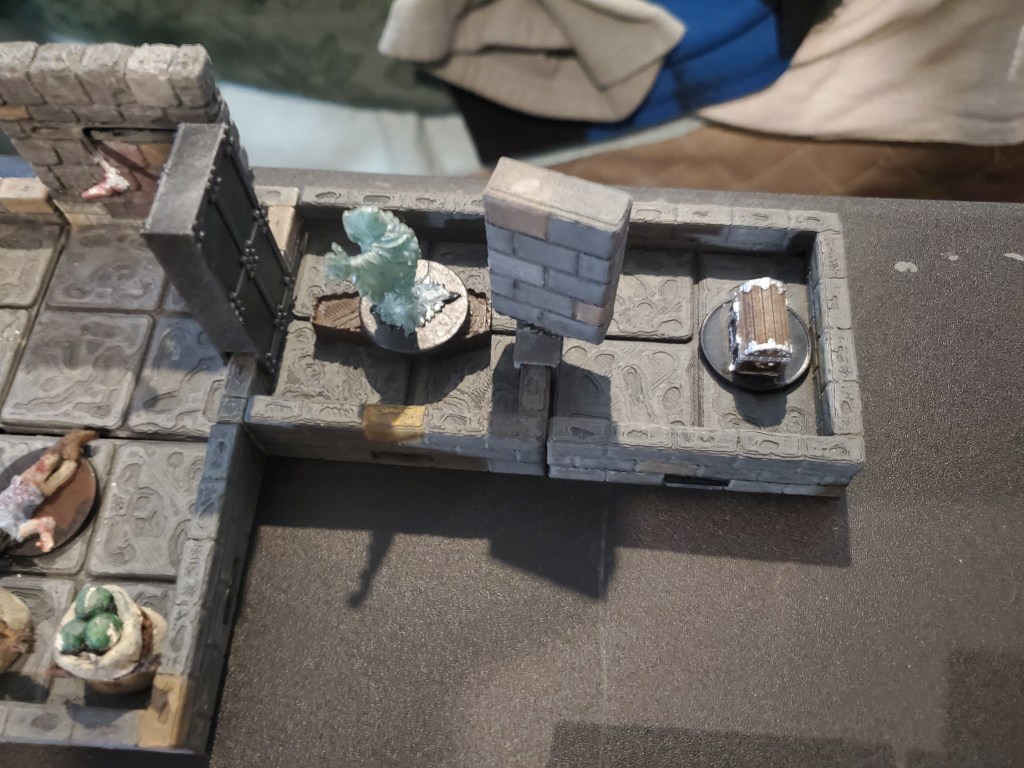
Here is a fly-over of my take of the Warlock’s Abode. As you can see, I got it to fit on a 3′ x 3′ table so it should be playable on a table at a convention. I can always shuffle rooms to keep them to the point of playable no matter the table size. Below is the one-page map with notes that I would use to run the game.
General Details for the Dungeon: All of the walls, floors, and ceilings are made from cut stone blocks. The ceilings are 10 ft high and there are no lights in the dungeon.
At the bottom of the stone steps is a solid metal door. The metal door is the entrance to the Warlock’s Abode. It is closed but not locked.
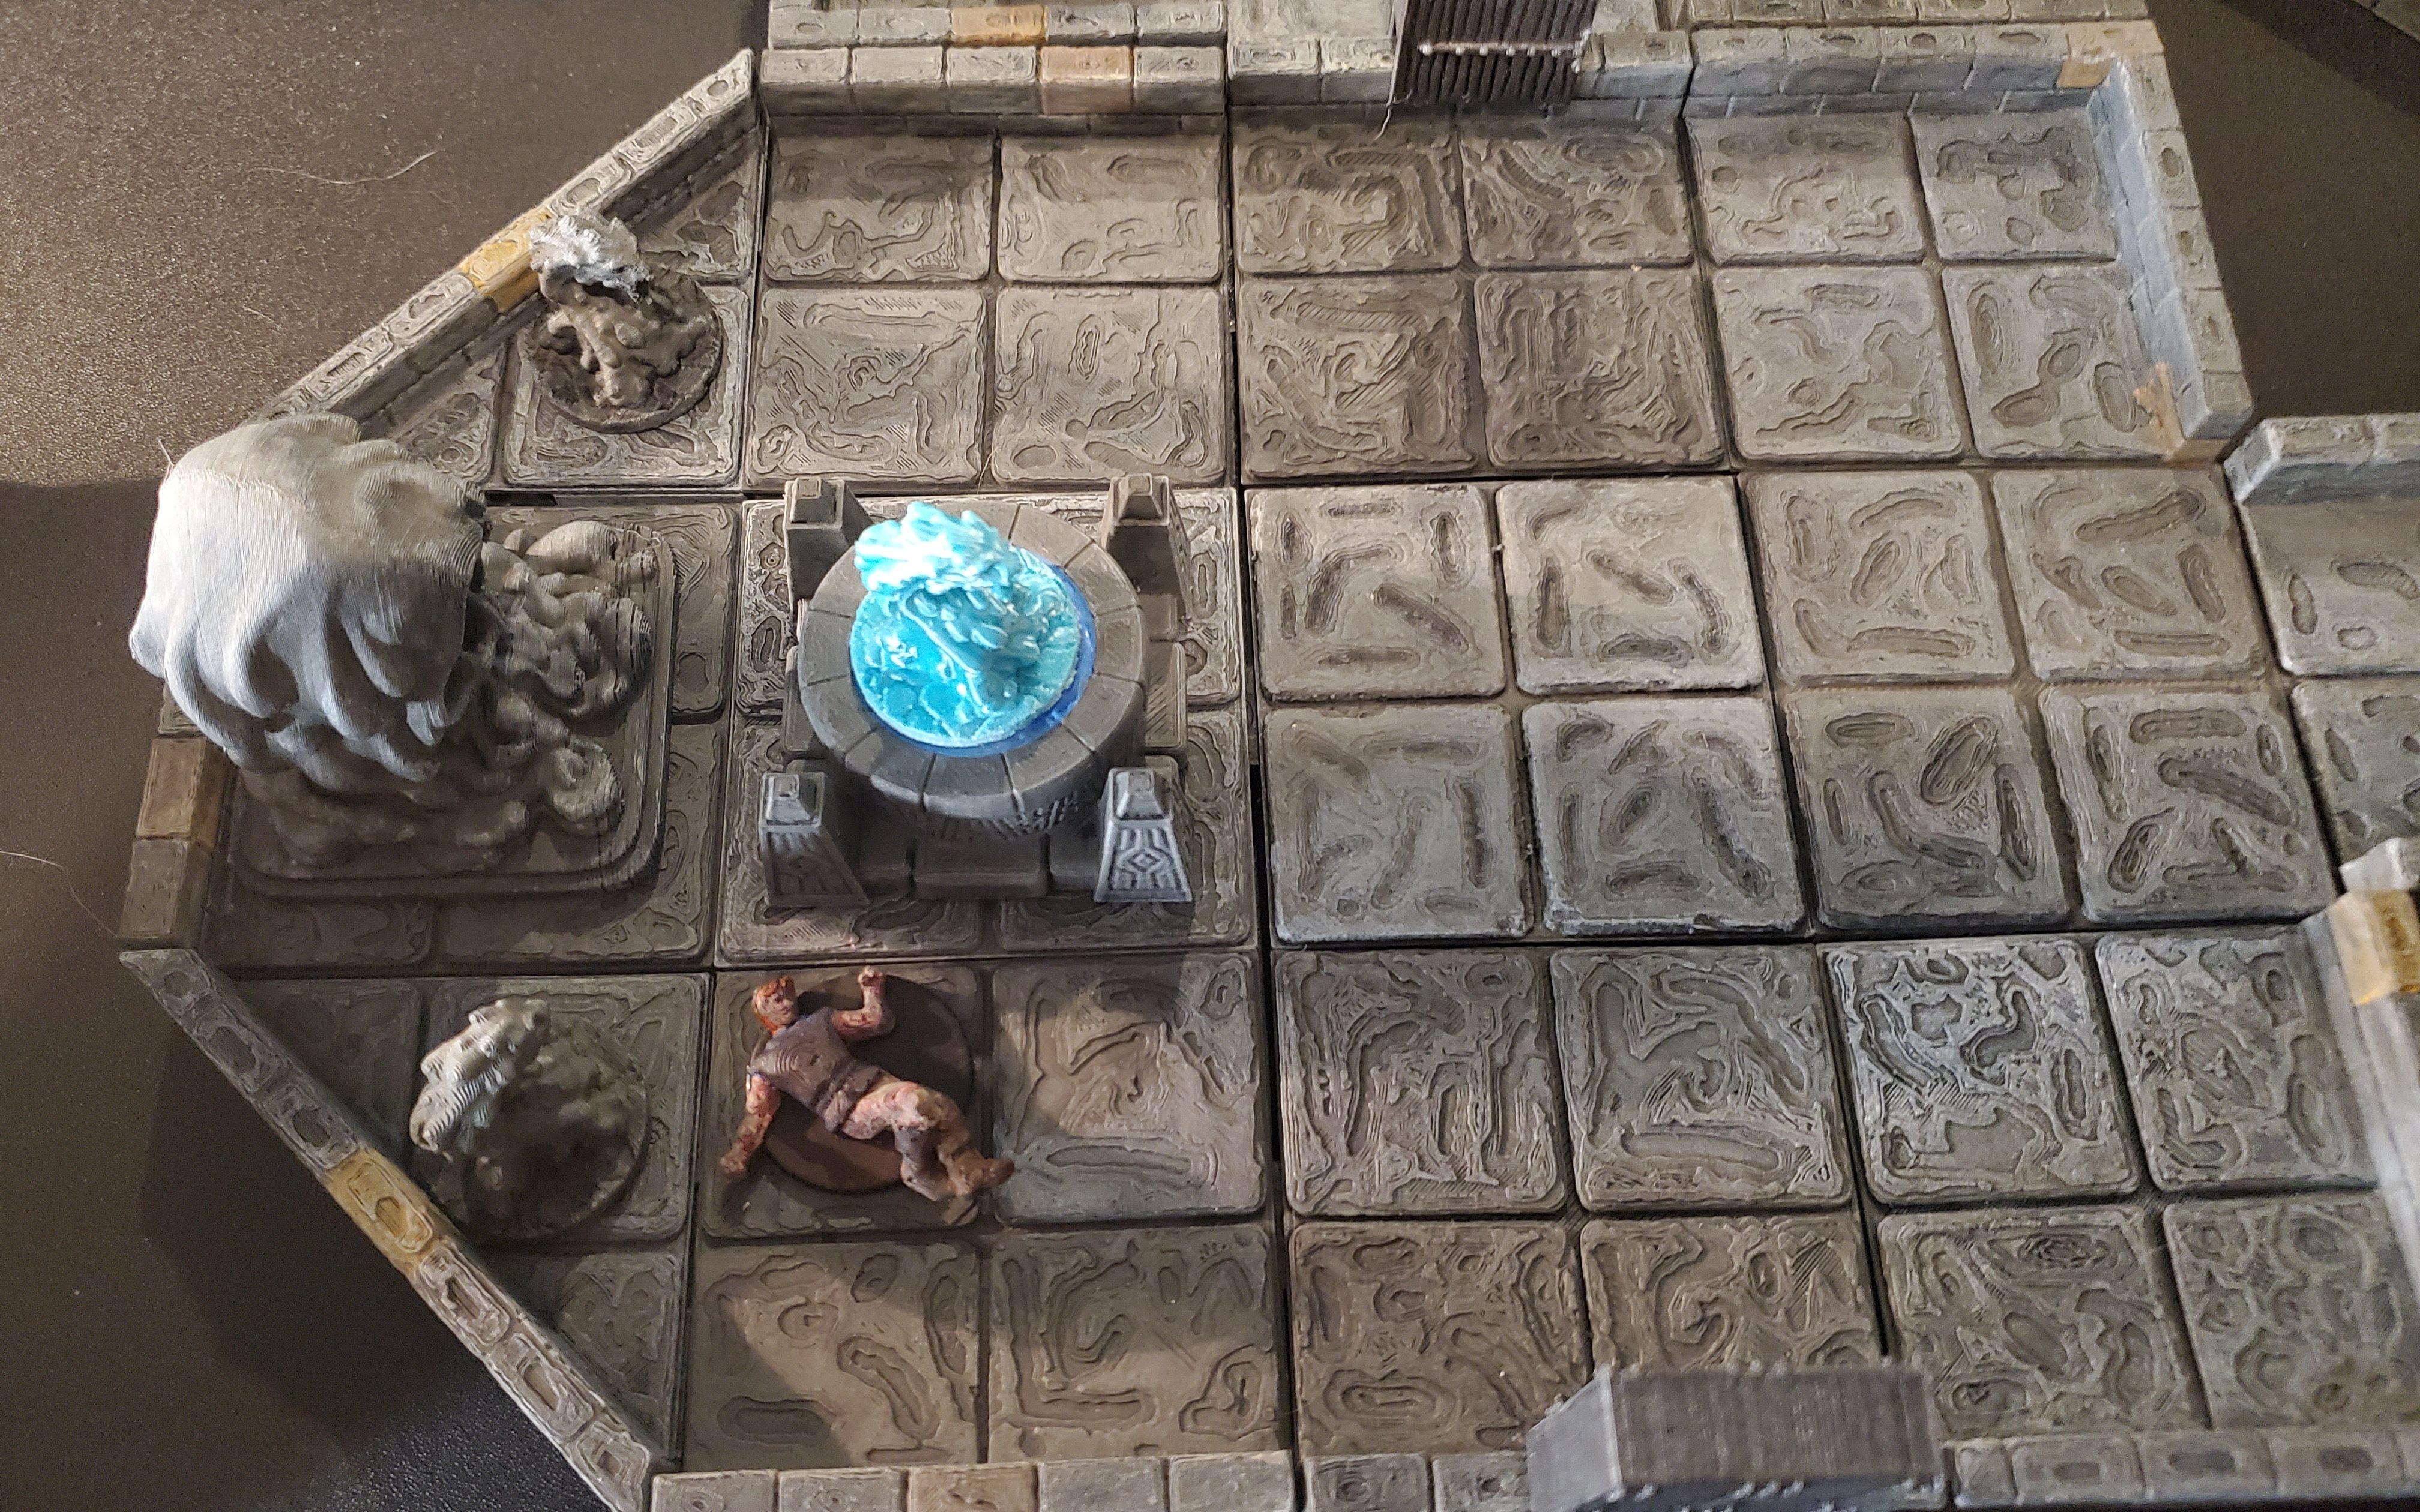
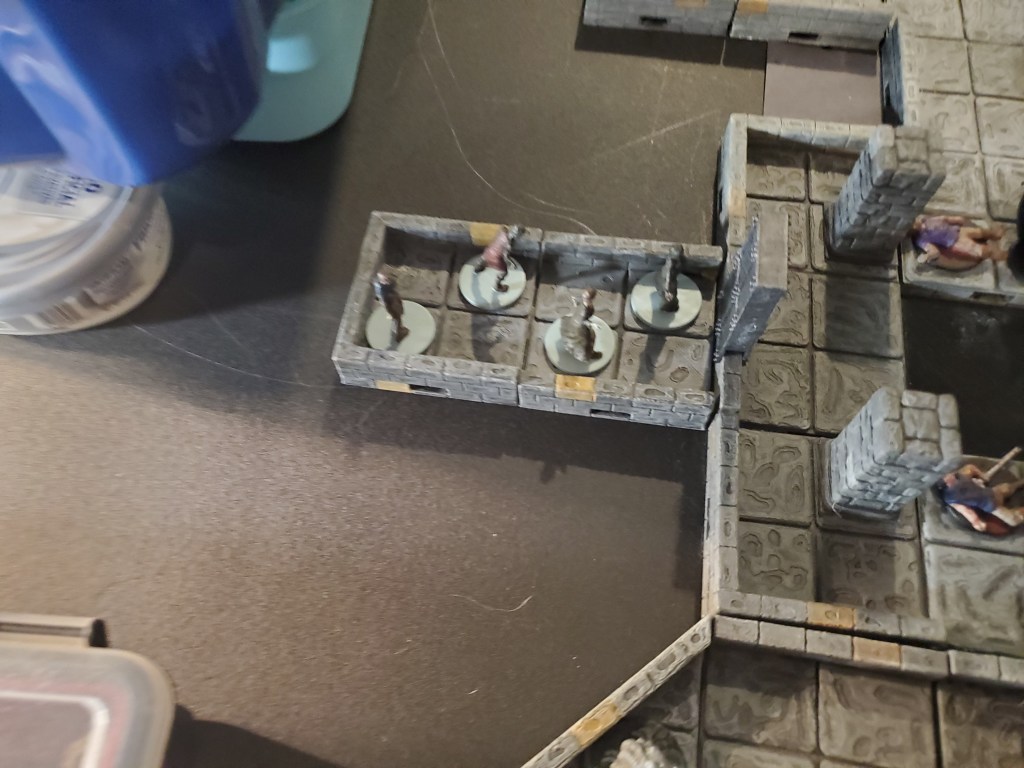
Room #1 – The Western wall has a large stone statue of a ravenous blob that is flanked on either side by a smaller statue of a slime spirit. If the players ask if they know anything about the statues, have them roll either Religion or History.
Just to the East of the statues is an ornate well that is filled with water. At the bottom of the well are a triangle blue metal puzzle piece and a torch. Just South of the well is the body of Richard, one of the brothers. If checked, his clothes are wet. If the players roll a Medicine check over 15, they can tell that Richard died from drowning. If the water is disturbed, a lesser water elemental attacks. There is a wooden door to the North (not locked) and an open passage to the East.
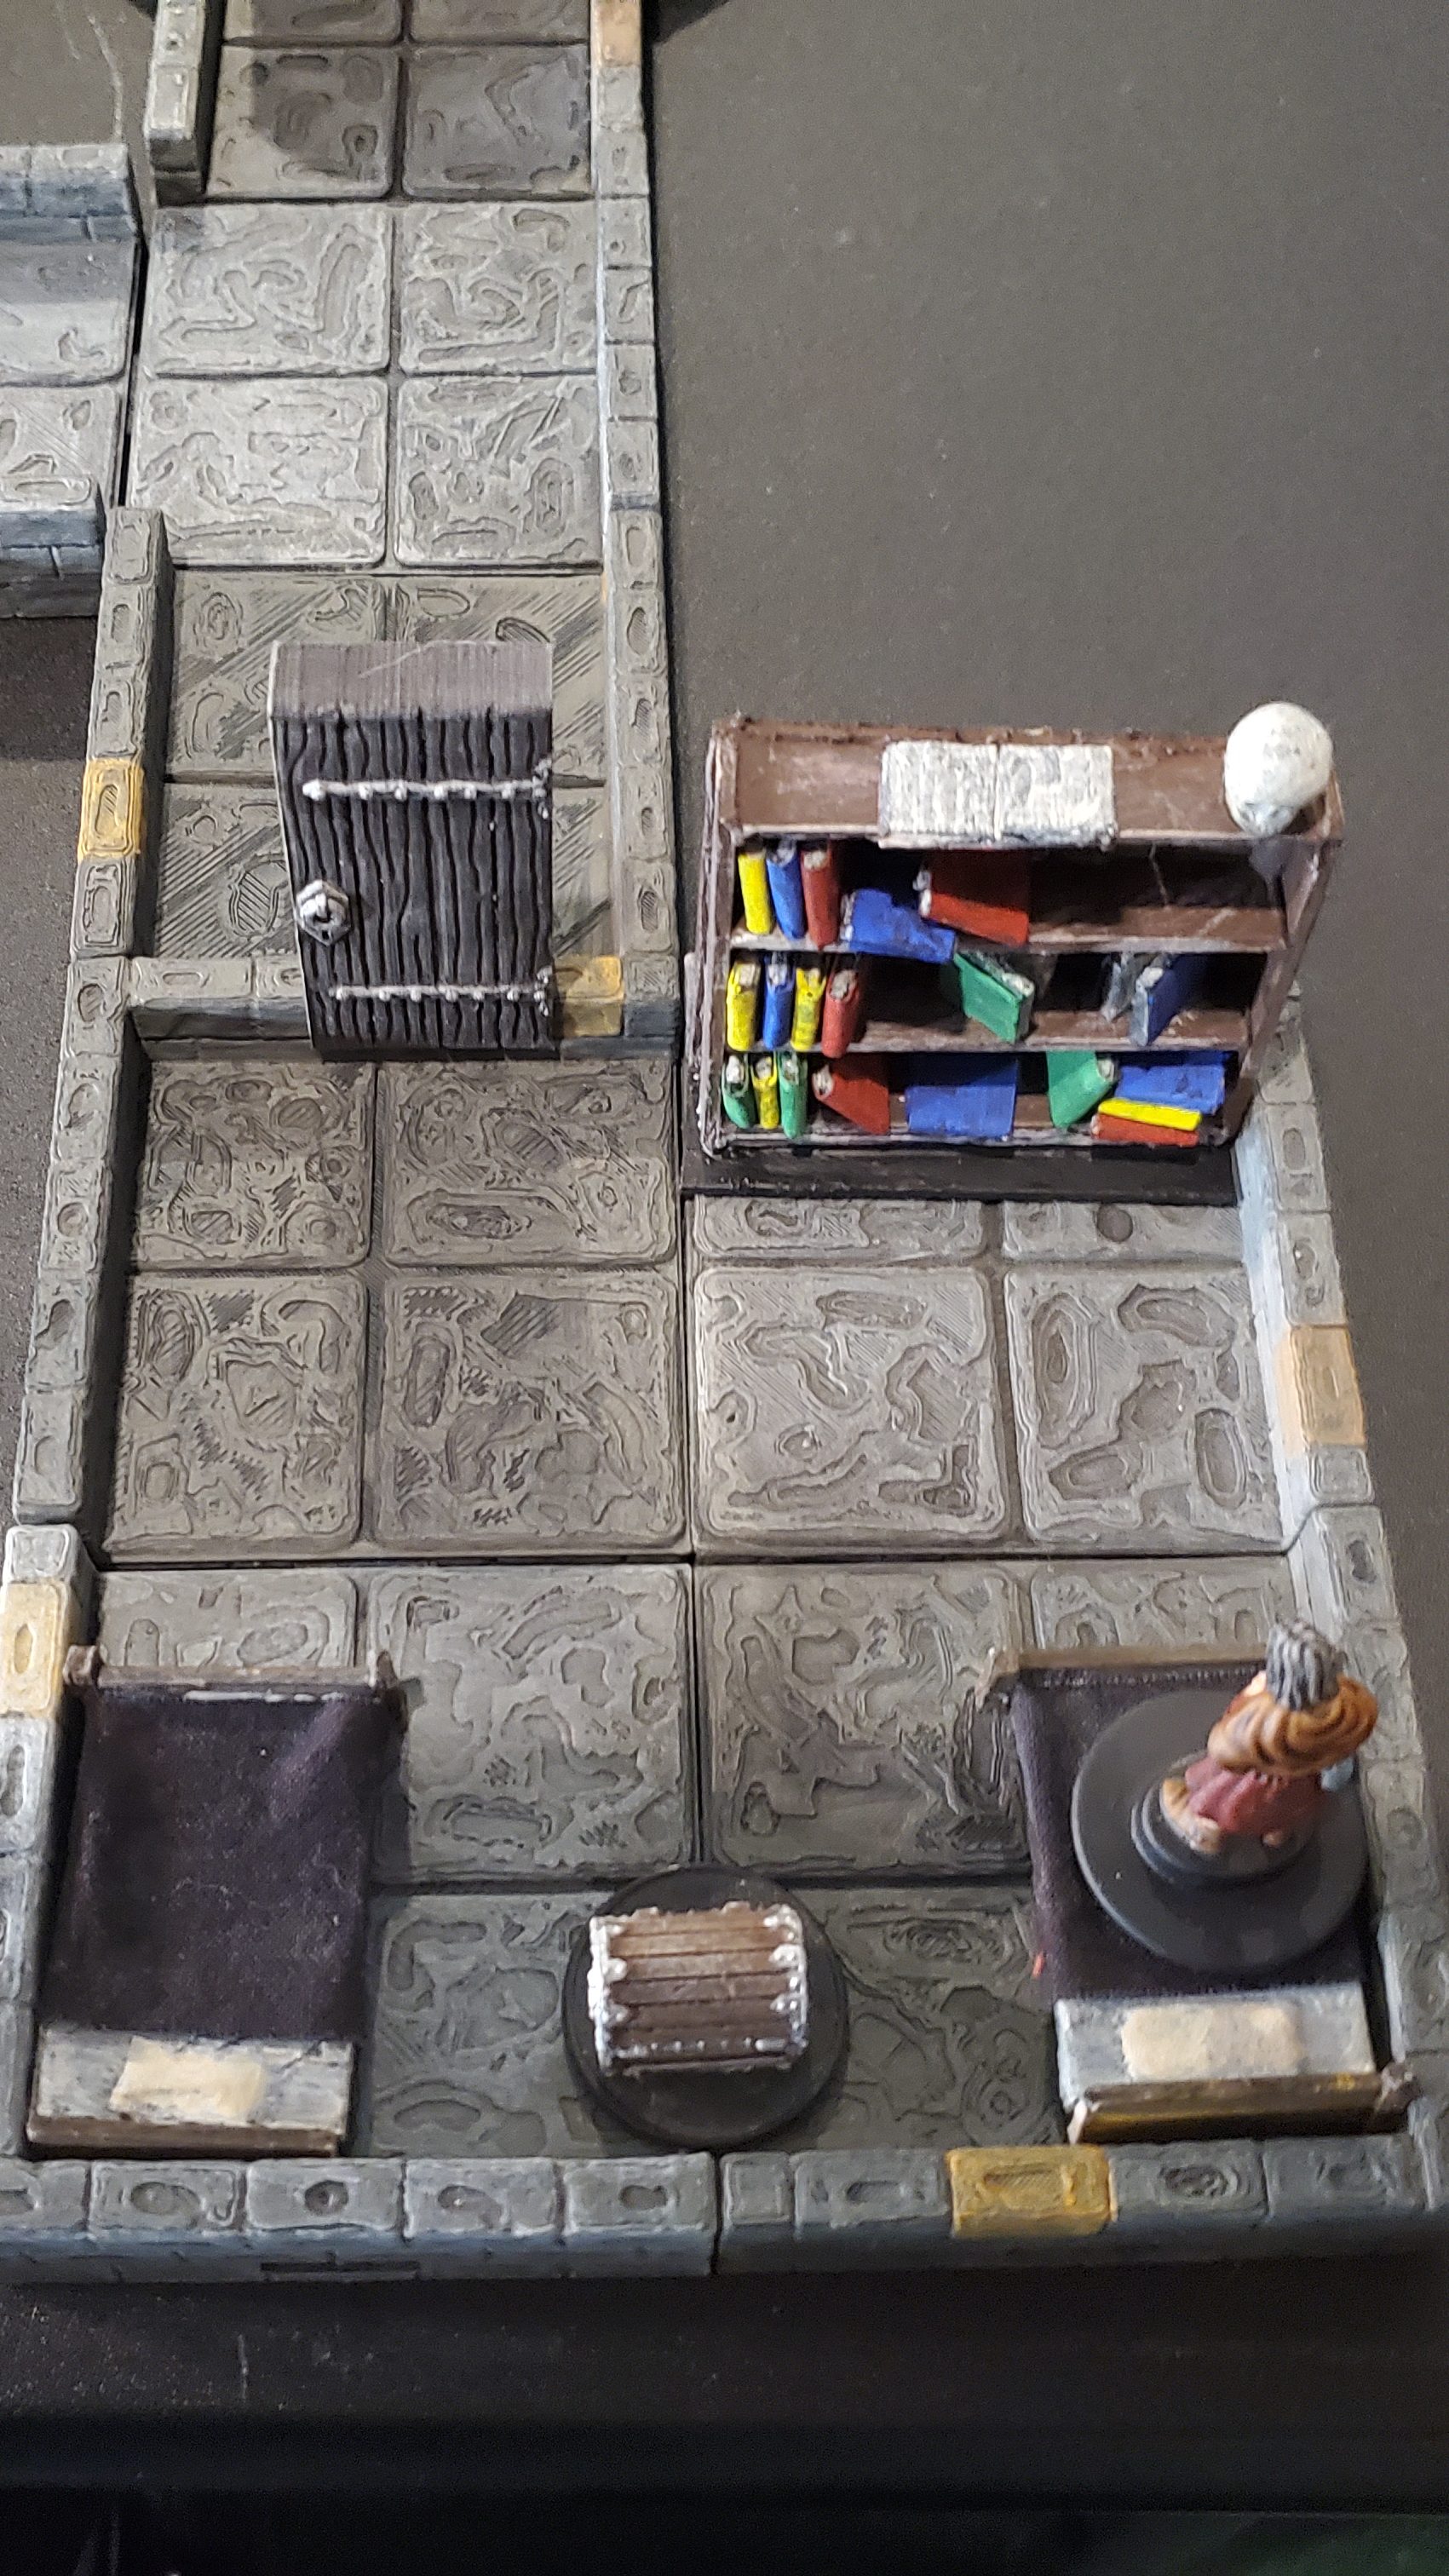
Room #2 – The room is a complete mess. All of the books from the bookshelf are on the floor as well as all of the contents of the chess between the beds. Under the bed to the east is Thomas, the youngest brother. He is clutching a round blue metal puzzle piece he found in the chest. He will not let the piece go under any circumstance (this is all that he has left). He is terrified of the darkness that grabbed his two brothers in Room 5. He heard Hans scream in Room 1 before it went dark (Han’s torch is in the well). If the party spends 10 minutes searching through the mess on the floor, they find a SCROLL of THUNDERWAVE.
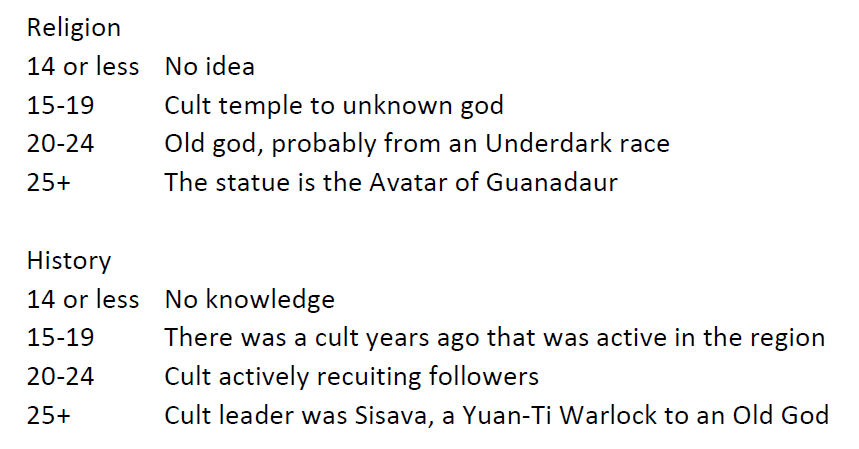
Room #3 – The double doors that lead into this chamber are locked. A DC 15 Thieves’ Tools check will open the door. Otherwise, the doors will need to be destroyed (AC 10, HP 20). Inside the room are a large bed, a bookcase, and a large chest. The chest is not locked but it is trapped. DART TRAP (+4 Attack, 1d10 poison damage on hit). Inside, the chest contains cloaks and clothes, a potion of healing, and a square blue metal puzzle piece. The bookshelf has a SCROLL of MISTY STEP. Most of the books are written in Abyssal and talk about the history of the Yuan-Ti people. There are some books on the Drow and their old gods. Also a flyer for Guanadaur (Join Guanadaur handout).
Room #4 – This small room holds four (4) zombies. They are just standing here and will not do anything until the metal door to Room #5 opens. At that point, all of the zombies rush forward and attack any living creature. The room is bare besides the zombies.
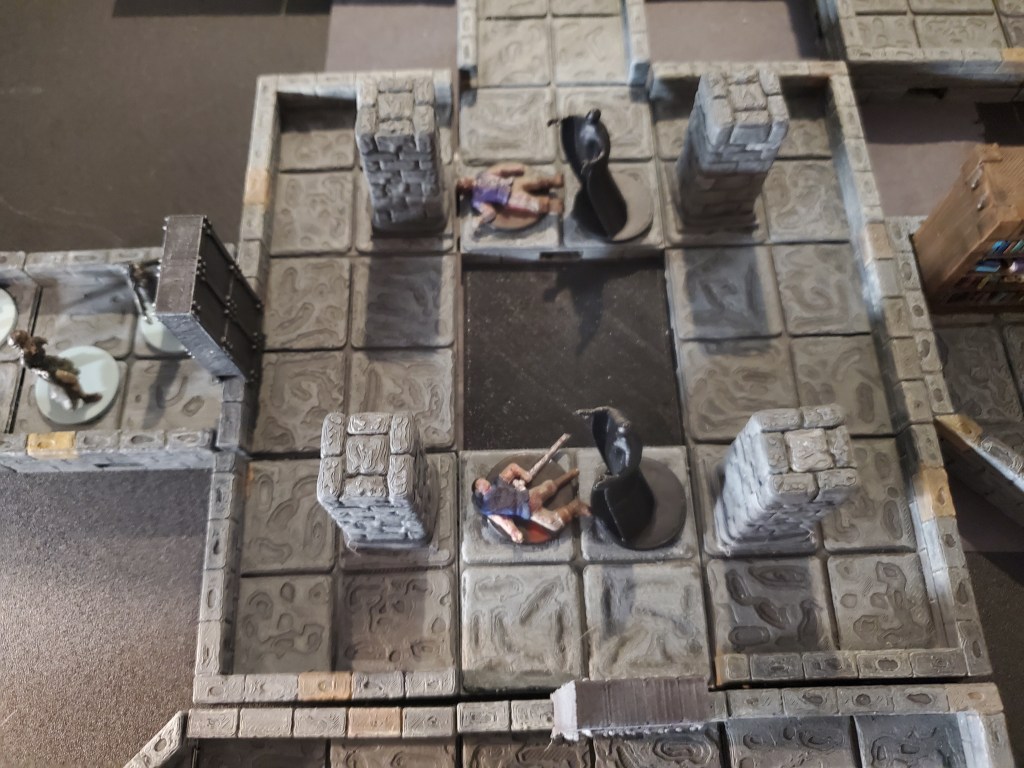
Room #5 – This room contains a deep pit in the center. North of the pit lies the body of William and South of the pit is the body of Richard. Both bodies look withered. The pit is about 30ft down before it ends in magical darkness. Inside of the pit is a blue metal hexagonal puzzle piece and two (2) shadows. The shadows will wait for the party to open the door to Room #4 before they attack. Otherwise, they will attack anyone that ventures into the darkness of the pit to protect the puzzle piece. There is a metal door on the West wall to Room #4 and an open passage to the North.
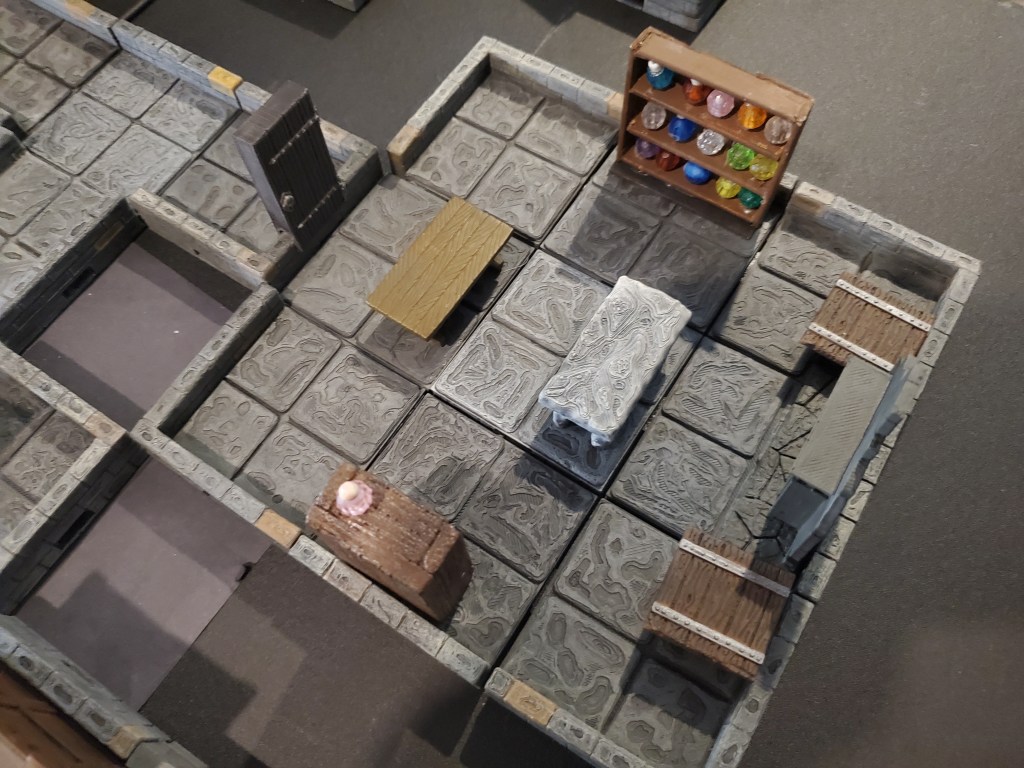
Room #6 – Behind the unlocked wooden door lies the laboratory. There is a massive fireplace on the Eastern wall. A stone table sits in front of the fireplace. There are two smaller wooden tables that flank the fireplace. A wooden table is in front of the doorways. There are potion racks on the North and South walls of the room. The room contains 4 different complete potions, a book on brewing potions, and a note that will describe the workings of the puzzle door (Handout)
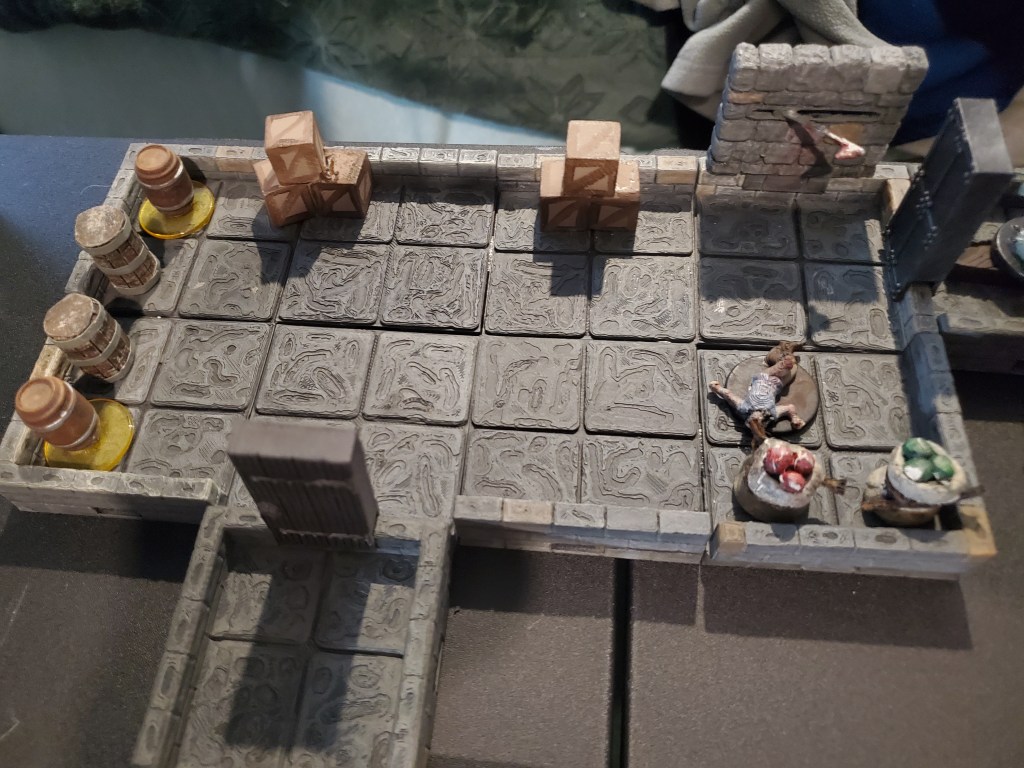
Room #7 – This room smells from all of the barrels and crates of rotten food that fill the room. By the Southern wall near some bags of rotten vegetables is the body of Henry, the oldest brother. He is dead and has a burn mark on his right arm near the inside of his elbow (he tried to kill the rot grub but failed). As soon as the player sees this, do the Dex Save DC 12 otherwise, the Rot Grub hits and the player takes 1 piercing damage. Roll a d4. The player has that many rounds to either burn the wound with fire (1d6 fire damage) or use a slashing/piercing weapon to do weapon damage to the affected body part. After the time is up, the player falls to the ground unconscious and will take a failed Death Save every round until someone saves them by the means listed above.
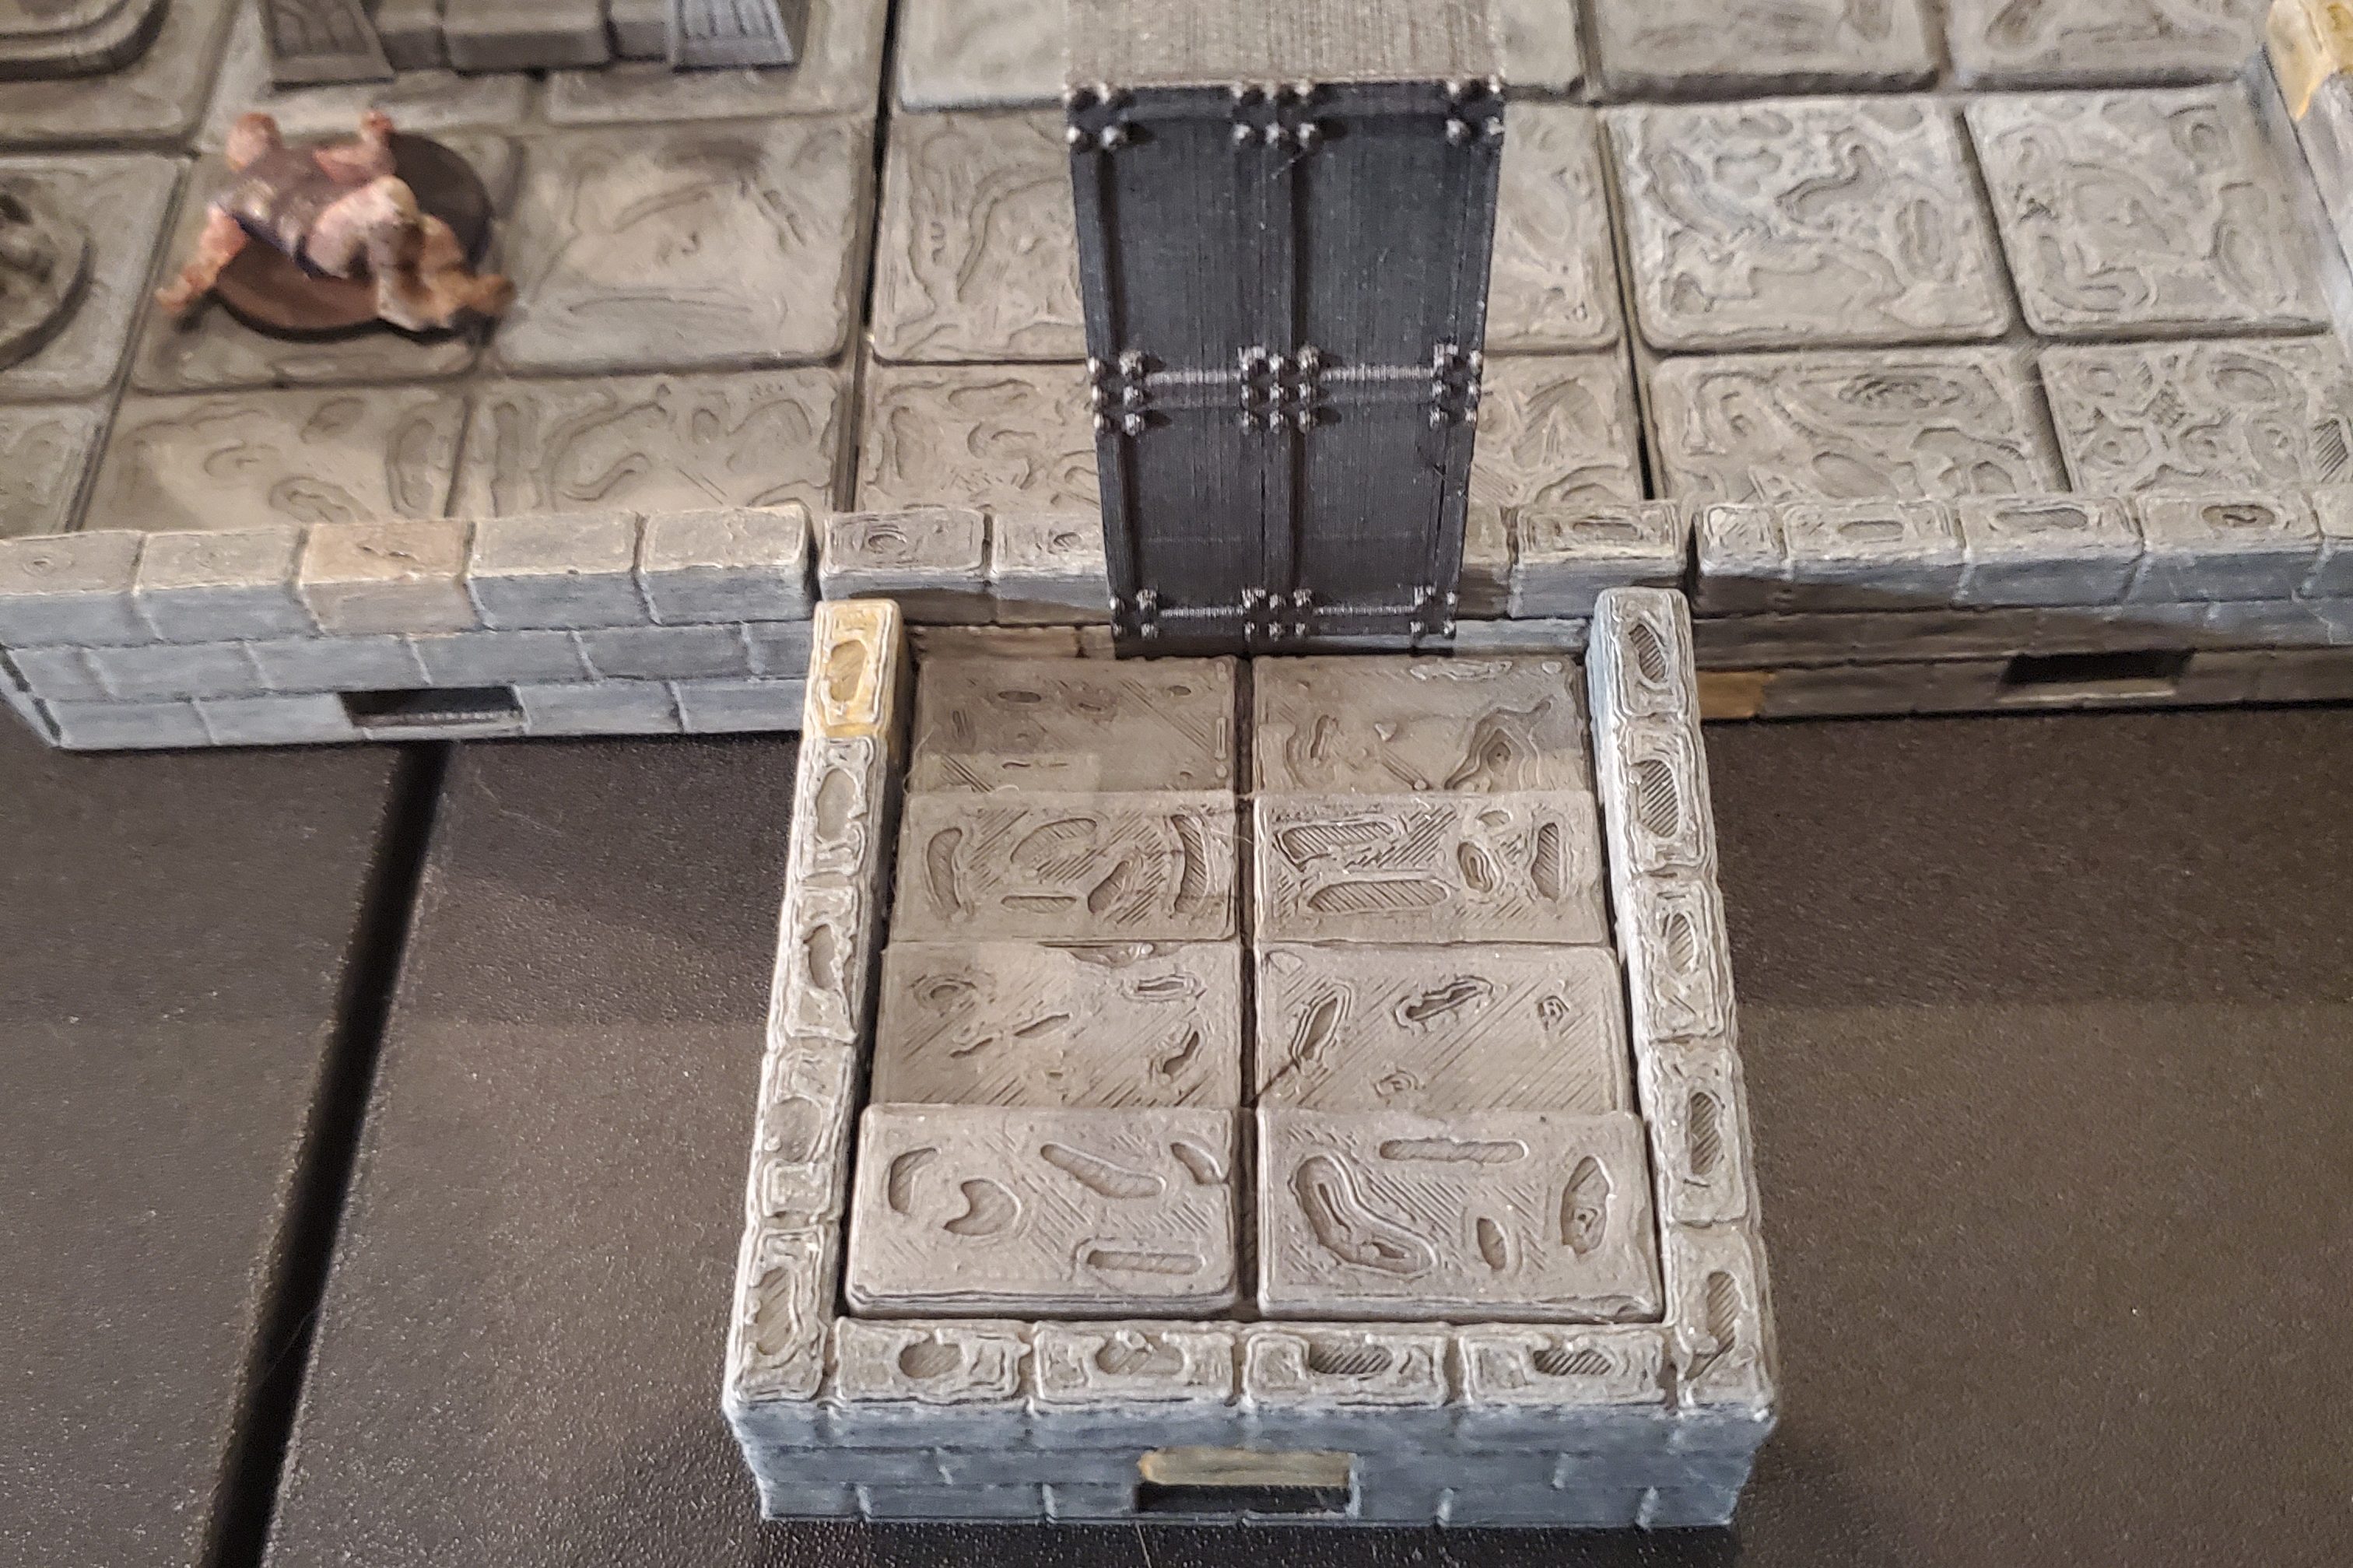
In the Northeast wall is a large metal door with no handles. There are a series of runes and markings on the door. There are 4 holes in the door that match up with the 4 puzzle pieces that the players have found. The pieces need to be placed into the door in the correct order. Otherwise, a blade extends from the North wall, attacking the player that is inserting the piece into the wall. The blade resets after the attack.
Room #8 – When the door opens, there is a beautiful metal casket lying in the middle of the chamber. When the party enters the room, an ethereal shape rises from the casket. It is the ghost of Sisava. When the ghost appears, have Thomas (if he is still alive), scream out in horror and instantly age 40 years. (Roll the die behind the screen but disregard the results).
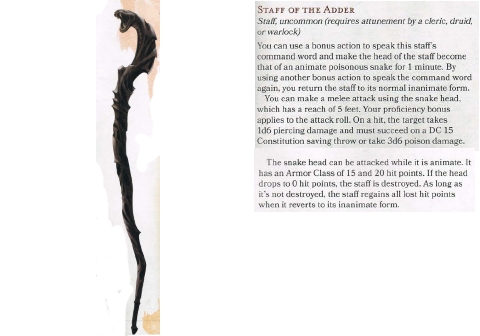
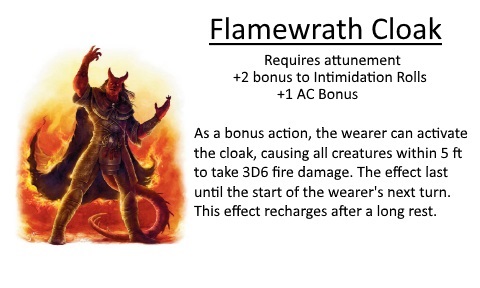
When the ghost is defeated, the secret door behind the coffin will swing open to reveal the chest. Inside there are 5,000gp, a Staff of the Adder, and a Firewrath Cloak. I have 3″x5″ cards with the magic items printed on them that I can hand out. The cloak was a gift from Themberchaud the Red Dragon from the Out of the Abyss adventure. Since Sisava the Warlock and her party helped him, he had special magic items (all fire-based) custom-made for the party. I got the idea for the item from 4th edition. Since you had to have magical items at higher levels, there were so many different types with descriptions. I like to pull the names and basic function from 4E and use it for my “new” item.
That is the new one-shot adventure that I will try running at the next game convention that I attend or run for my friends when we all can’t make a session.
Attached below are the stats for all of the monsters that appear in this adventure, a file that has the scroll spells and the different custom potions, the note of the order of the puzzle pieces, and the handout for Guanadaur.
Please feel free to download all of the materials and give this adventure a try. I would love to hear how it goes.
As always, keep on gaming!

what was the name of the dungeon tile set you used to create the whole thing.
LikeLiked by 1 person
The tiles are True Tiles from Hero’s Hoard. I think Wyloch helped in the designing of them since they are based on his 1-1/4″ grid system.
LikeLike
Love the dungeon set up. Nice little one shot too.
Cheers,
Pete.
LikeLiked by 1 person