
11/02/2025
Happy Sunday and welcome back to Tabletop Thoughts!
It’s been another busy week juggling both jobs, but surprisingly, I managed to squeeze in more progress than I expected. Between late nights, half-empty cans of MTN Dew, and stolen moments of creativity, I actually got some good tabletop work done — and that always feels like a win.

An angel protects the remains of a church dedicated to his deity.
First up, here’s a look at this week’s projects: an angel from Massive Darkness 2 and a ruined church from The Printing Goes Ever On. The angel got the full SlapChop treatment — a solid drybrush of white followed by a coat of Army Painter Speed Paints to bring that celestial shine to life.
The ruined church was a fun print on my Elegoo Neptune 3 Pro. I ran it in two sections and glued them together for the final piece. After a base coat of black primer, I hit it with a white drybrush to bring out the stone details, then added a layer of grass-green India ink to make the vines pop. A final drybrush of sage green craft paint gave everything that perfect overgrown, weathered look — like a holy place that’s seen better (and probably bloodier) days.
If you like how it turned out, the ruined church is available on my Etsy store! I try to keep it in stock, so if it’s sold out, check back soon — I’m always printing more.
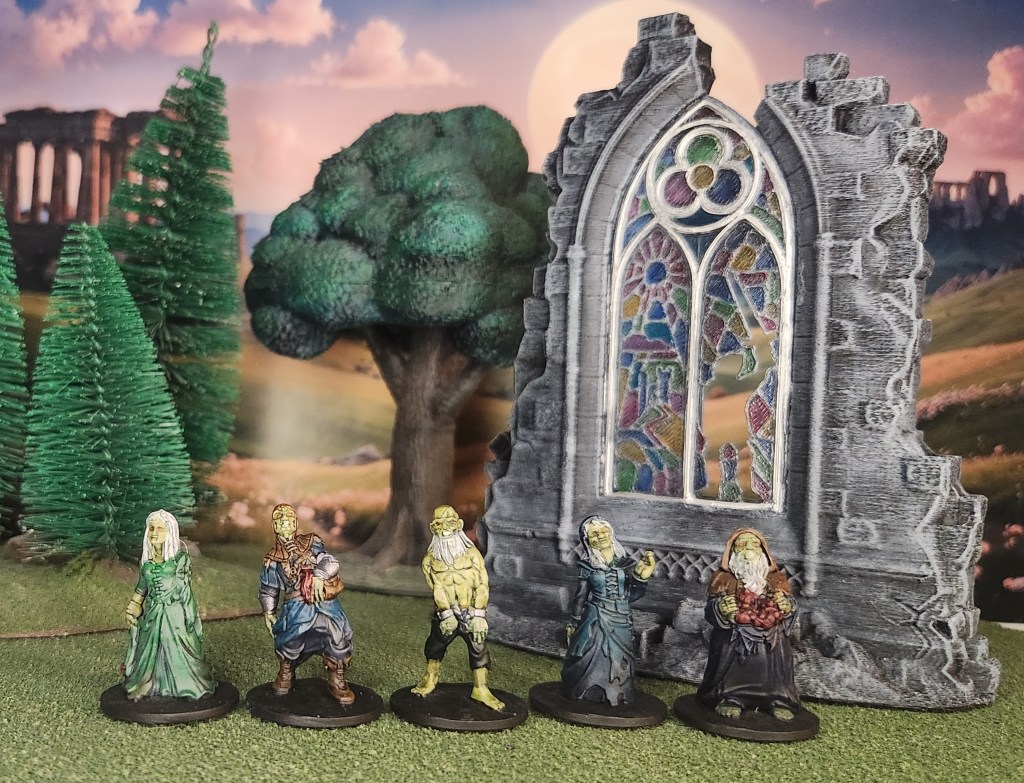
The dead shamble around the remains of a stained glass window.
Next up, we’ve got some zombies from Fat Dragon Games. The models are designed to print supportless on an FDM printer, but I decided to run them through my Elegoo Mars 3 resin printer instead. I really wanted to finish them up this week, so I’ll admit — I got a little lazy with the paint jobs. They still turned out pretty great, though! I used my go-to SlapChop technique (currently my best method for getting things painted and off the table), gave them shock-white hair, and went with a malignant green for their skin.
The broken window behind them is from Brite Minis. I printed it in FDM and gave it a simple white drybrush to bring out the stone texture. The stained glass was done with India inks, then coated with gloss Mod Podge to give it that shiny, glass-like finish. Honestly, it looks better in person than it does in the photo — the camera just doesn’t capture the light the same way.
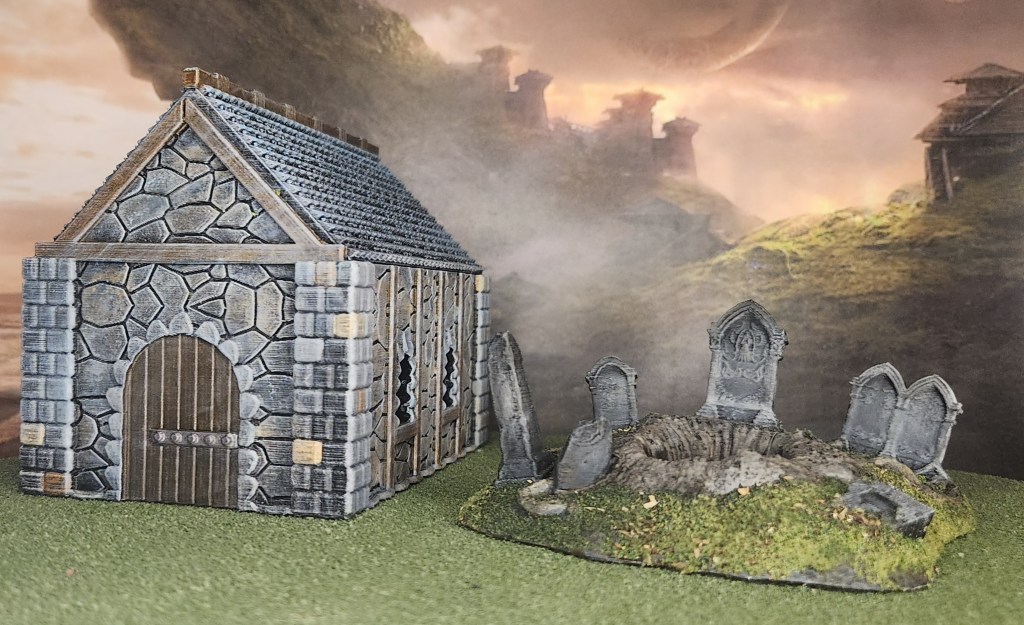
An old mausoleum and a recently dug-up grave.
The mausoleum, if I’m remembering right, is from The Printing Goes Ever On. I printed it on my FDM printer and gave it a good drybrush to bring out all that stone texture. I went in and painted individual stones on the pillars for a bit of color variation, then used a sponge to dab that same tone onto the walls — careful to avoid the blocks around the windows and door. The door itself got a rich brown paint job, with polished silver on the metal banding to make it stand out.
The open grave is also from The Printing Goes Ever On. It got a simple drybrush, with the ground painted brown and the stones in shades of gray. I used a 50/50 mix of PVA glue and water to apply flocking to the ground, then topped it off with a bit of my homemade blend of dead leaves and grass. I’m really happy with how it turned out — it has that perfect “freshly dug and long forgotten” vibe, and it’ll definitely make an appearance any time I need a proper graveyard setup.

A manticore prepares to ambush its prey.
Finally, I wrapped up a manticore from EC3D Design. I’d printed one of these before and really liked how it turned out, so I stuck with the same color scheme for this one. The model was printed in resin, primed black, and then drybrushed white to bring out the details. From there, it got the SlapChop treatment with Speed Paints to finish it off — quick, effective, and it really makes those monstrous features pop.
Keep on gaming!
